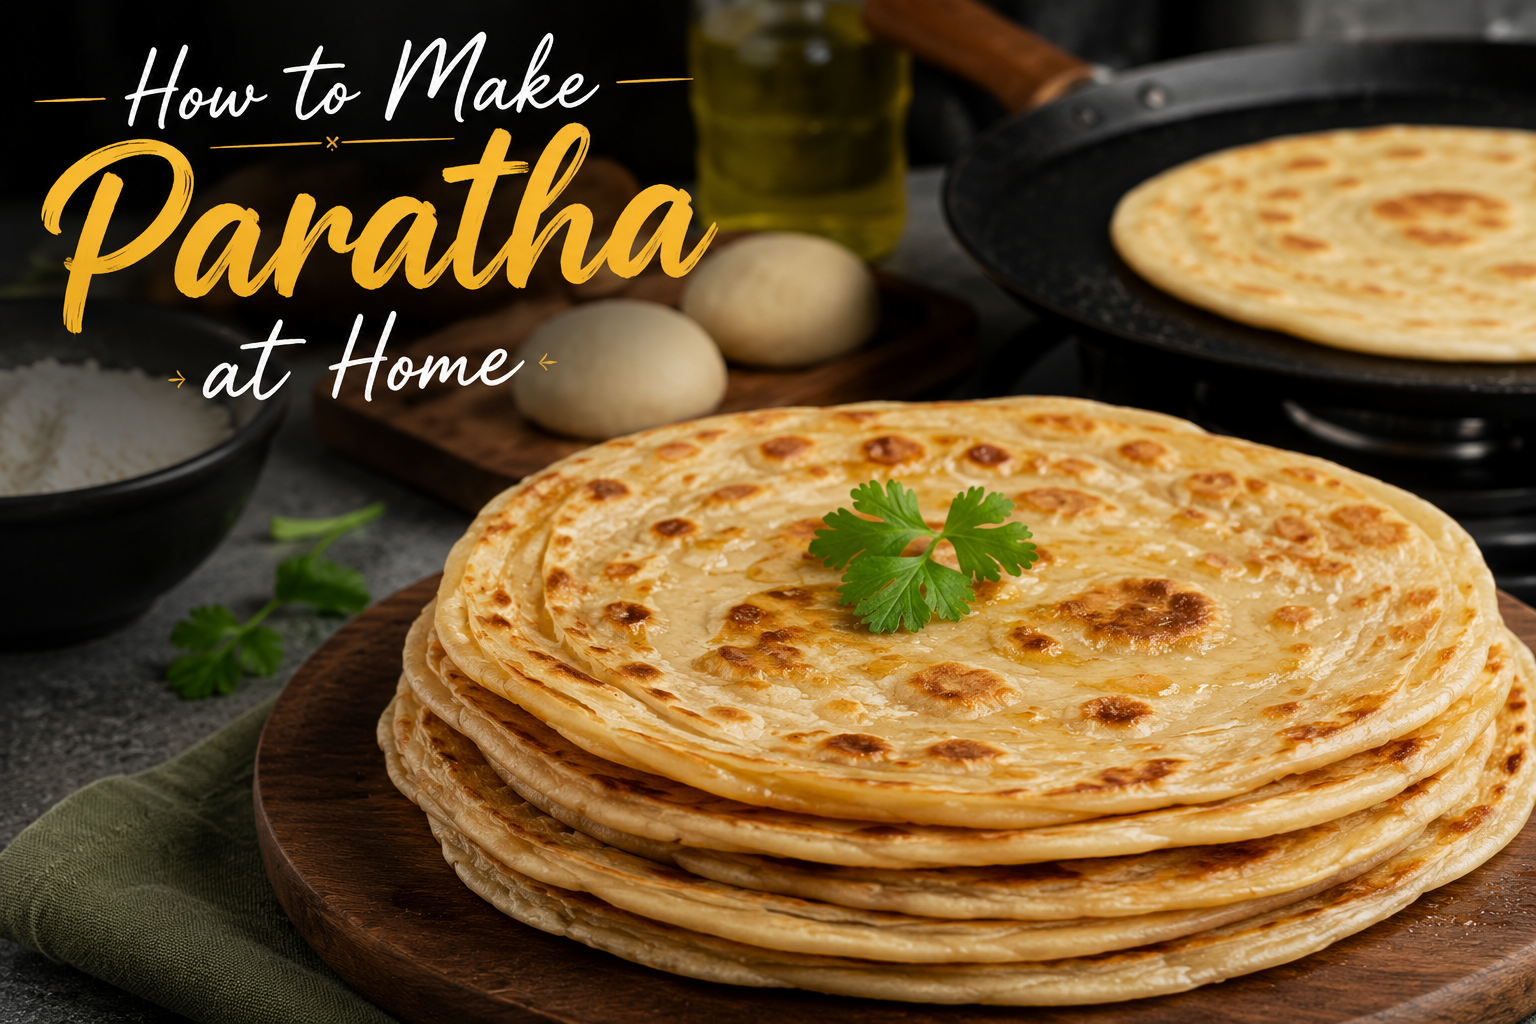
Want to learn how to make paratha at home? This complete guide walks you through every step, from preparing the perfect dough to rolling, layering, and cooking soft, flaky parathas. Whether you're a beginner or an experienced home cook, you'll discover simple techniques to make delicious homemade paratha every time.
How to Make Paratha at Home
If you're searching for how to make paratha at home, you've come to the right place. This complete guide shows you how to prepare soft, flaky, and flavorful homemade paratha from scratch. You'll learn everything from choosing the right flour to kneading, rolling, layering, and cooking the perfect plain paratha every time.
What Is Paratha?
Paratha is a traditional South Asian flatbread loved across Pakistani cuisine and Indian cuisine. It is made by preparing a simple dough using whole wheat flour (atta), water, salt, and a little oil or ghee. The dough is rolled, folded into layers, and cooked on a hot tawa or skillet until golden brown.
Unlike roti or chapati, paratha is known for its flaky layers, crisp exterior, and soft interior. Some varieties are plain, while others are stuffed with fillings such as potatoes, paneer, minced meat, or vegetables.
One of the reasons paratha remains so popular is its versatility. It can be enjoyed for breakfast with yogurt and pickle, served alongside curry for lunch, or paired with tea as an evening snack. Once you learn how to make paratha at home, you'll discover that fresh homemade paratha tastes far better than frozen or store-bought versions.
Why Make Paratha at Home?

Making homemade paratha is easier than many beginners think. While buying ready-made paratha may seem convenient, preparing it from scratch gives you complete control over the ingredients, texture, and flavor.
Fresh paratha has a soft center, crispy edges, and delicate layers that are difficult to achieve with packaged products. You can also adjust the amount of ghee, butter, or oil according to your preference.
Homemade paratha is also free from unnecessary preservatives, making it a wholesome addition to family meals. Whether you are preparing breakfast for children or serving guests during dinner, freshly cooked paratha always feels special.
Another advantage is flexibility. Once you master the basic recipe, you can easily experiment with herbs, spices, seeds, or stuffed fillings to create different variations.
Ingredients You Need to Make Paratha at Home
One of the best things about learning how to make paratha at home is that the ingredients are simple and commonly found in most kitchens.
For a classic plain paratha, you will need:
- Whole wheat flour (atta)
- Salt
- Water
- Oil or ghee
- Extra flour for rolling
- Additional ghee or oil for cooking
Although this ingredient list is short, each item plays an important role in creating soft and flaky layers.
Whole Wheat Flour (Atta)
The most important ingredient is whole wheat flour, commonly known as atta. It creates a soft dough with enough elasticity to roll and fold into thin layers.
Good-quality atta absorbs water evenly and produces paratha with a tender texture. Fresh flour also gives the bread a pleasant aroma and natural wheat flavor.
While some people use all-purpose flour, traditional paratha made with atta has a more authentic taste and a healthier nutritional profile.
Water
Water brings the dough together and activates the gluten in the flour. Adding it gradually helps you achieve the correct consistency.
Too much water makes the dough sticky, while too little creates a dry dough that becomes difficult to roll.
Room-temperature water works best for most recipes because it allows better control during kneading.
Salt
Salt enhances the natural flavor of the dough. Even though only a small amount is required, it makes a noticeable difference in the final taste.
Ghee or Oil
Ghee is traditionally used for both layering and cooking paratha. It creates flaky layers while adding a rich buttery aroma.
Oil is another excellent option if you prefer a lighter flavor. Many home cooks even combine both for the perfect balance of taste and texture.
Choosing the Best Flour for Homemade Paratha
One of the biggest secrets to making soft whole wheat paratha is selecting the right flour.
Why Atta Is the Best Choice
Traditional atta contains finely milled whole wheat that creates soft, flexible dough. It is easy to knead, stretches well during rolling, and produces beautiful flaky layers after cooking.
Because it contains the wheat bran, atta also gives paratha a pleasant earthy flavor that pairs perfectly with curries, yogurt, and pickles.
Can You Use All-Purpose Flour?
Yes, but the results will be slightly different.
Paratha made with all-purpose flour tends to be softer and lighter in color. However, it lacks the nutty flavor and hearty texture of whole wheat flour.
Some cooks mix atta with all-purpose flour to create a balance between softness and traditional flavor. This method also makes rolling slightly easier for beginners.
Can You Use Gluten-Free Flour?
Gluten-free flour blends can be used, but they require different techniques because they lack the elasticity of wheat flour.
If you're making paratha for the first time, whole wheat flour is still the easiest and most reliable option.
How to Prepare the Perfect Paratha Dough

The dough is the foundation of every great paratha. Even the best rolling technique cannot fix dough that is too dry or too wet.
Fortunately, preparing paratha dough is simple once you understand the process.
Step 1: Mix the Dry Ingredients
Begin by placing the whole wheat flour into a large mixing bowl. Add the salt and stir everything together so the seasoning is evenly distributed.
This small step ensures every bite has balanced flavor.
Step 2: Add Water Slowly
Instead of pouring all the water into the flour at once, add it little by little while mixing with your hands.
Gradually combining the ingredients allows the flour to absorb moisture evenly and prevents sticky patches from forming.
The mixture will first appear crumbly before coming together into a rough dough.
Step 3: Knead the Dough
Once the dough begins to hold together, transfer it onto a clean surface and start kneading.
Press the dough forward with the heel of your hand, fold it back, and repeat the motion. Continue this process until the dough becomes smooth, soft, and elastic.
This step develops the gluten, making it easier to roll the dough without tearing.
Proper kneading is one of the most important parts of how to make paratha at home, as it directly affects the final texture.
Why Resting the Dough Is So Important
One of the most overlooked steps in how to make paratha at home is allowing the dough to rest.
After kneading, cover the dough with a clean kitchen towel or a lid and let it rest for at least 20 to 30 minutes.
During this time, the gluten relaxes, making the dough easier to roll. Resting also allows the flour to fully absorb the water, resulting in softer and more pliable dough.
Skipping this step often leads to paratha that shrinks while rolling or feels chewy after cooking.
Professional cooks rarely skip the resting stage because they know it is essential for achieving thin layers and a tender texture.
How to Divide the Dough
After resting, gently knead the dough for a few seconds before dividing it into equal portions.
Each dough ball should be smooth and round without cracks on the surface. Keeping the portions similar in size helps every paratha cook evenly.
Cover the dough balls with a cloth while working to prevent them from drying out. Dry dough develops cracks that make rolling difficult and reduce the quality of the finished homemade flatbread.
Preparing Your Rolling Surface
Before you begin rolling, lightly dust your work surface and rolling pin with flour.
Avoid using too much flour because excess dry flour burns on the hot tawa and can leave dark spots on the finished paratha.
Place one dough ball on the rolling board and gently flatten it with your fingers before using the rolling pin.
At this stage, avoid pressing too hard. Gentle, even pressure produces a smoother circle and helps maintain an even thickness throughout the dough.
Preparing the rolling surface correctly sets the foundation for creating beautiful layers, which is one of the defining characteristics of an authentic plain paratha.
How to Roll Paratha Like a Pro
Now that your dough has rested, it is time to learn one of the most important parts of how to make paratha at home. Rolling the dough correctly helps create an even shape and gives the paratha its signature flaky layers.
Many beginners think rolling requires special skills, but the secret is to work slowly and use gentle pressure. A soft dough and a lightly floured surface make the process much easier.
Start by placing one dough ball on your rolling board. Flatten it slightly with your fingers, then use a rolling pin to roll it into a small circle. Turn the dough slightly after every few rolls to maintain an even shape.
If the dough sticks, dust it with a little flour. However, avoid adding too much because excess flour can dry out the dough and burn while cooking.
The goal is to create a smooth, even circle without cracks around the edges.
Keep the Thickness Even
Even thickness is essential for a well-cooked homemade paratha. If one area is thicker than another, the thinner section may overcook before the thicker part is fully done.
Apply light pressure while rolling instead of pressing hard in one spot. Let the rolling pin glide smoothly across the dough to create an even surface.
If the dough starts shrinking, allow it to rest for a minute before rolling again. This usually means the gluten needs a little more time to relax.
How to Create Flaky Layers
The beautiful layers are what make paratha different from roti or chapati. They create a soft interior with crispy edges that make every bite satisfying.
Apply Ghee or Oil
After rolling the dough into a thin circle, lightly spread ghee or oil over the surface. This thin layer separates the dough during cooking and helps create flaky layers.
There is no need to use too much. A light coating is enough to produce excellent results while keeping the paratha balanced and flavorful.
Fold the Dough
Once the ghee has been applied, fold the dough to build layers.
Some home cooks fold it into a long strip before rolling it into a spiral, while others fold it into a square. Both methods work well and create beautiful layers.
After folding, gently press the dough and allow it to rest for a few minutes. This makes the final rolling process easier and helps the layers stay intact.
Roll the Folded Dough Again
Place the folded dough back onto the rolling surface and gently roll it into a medium-sized circle.
Avoid pressing too firmly because heavy pressure can flatten the layers you just created.
Instead, use slow and even strokes until the paratha reaches your preferred thickness.
How to Cook Paratha on a Tawa

Cooking is where all your preparation comes together. A properly heated tawa allows the dough to cook evenly while developing golden brown spots and flaky layers.
If the pan is too cool, the paratha becomes dry. If it is too hot, the outside may burn before the inside cooks.
Medium heat is usually the best choice for cooking plain paratha.
Heat the Tawa First
Always preheat the tawa before placing the rolled dough on it.
A properly heated surface starts cooking the dough immediately, helping it puff slightly and develop a soft texture.
Cast iron and heavy-bottomed skillets are excellent choices because they distribute heat evenly.
Cook the First Side
Place the rolled paratha onto the hot tawa and allow it to cook for about a minute.
Small bubbles will begin to appear on the surface. These bubbles show that the dough is cooking properly.
Once light brown spots develop, flip the paratha using a spatula.
Apply Ghee While Cooking
After flipping the paratha, spread a small amount of melted ghee over the cooked side.
Turn it over again and apply ghee to the other side as well.
As the paratha cooks, gently press the edges with your spatula. This helps every part of the bread come into contact with the hot pan for even cooking.
The surface should become beautifully golden with crisp spots while remaining soft inside.
Know When the Paratha Is Ready
A perfectly cooked paratha has golden brown patches across the surface with crisp outer layers and a tender center.
It should feel flexible rather than stiff. If the paratha becomes dry, it has likely cooked for too long or the heat was too low.
Once cooked, place it on a plate and cover it with a clean kitchen towel to keep it warm and soft while preparing the remaining parathas.
Should You Use Ghee or Oil?
One of the most common questions about how to make paratha at home is whether to cook it with ghee or oil.
Both produce excellent results, but each offers a slightly different flavor and texture.
Cooking with Ghee
Traditional Pakistani paratha and Indian paratha are usually cooked with ghee.
Ghee gives the bread a rich buttery aroma, crisp exterior, and soft interior. It also helps create beautifully flaky layers that many people associate with authentic homemade paratha.
If you enjoy classic flavors, ghee is the ideal choice.
Cooking with Oil
Oil creates a lighter paratha while still producing a crisp surface.
Many families use vegetable oil, sunflower oil, or other neutral oils for everyday cooking because they are readily available and have a milder taste.
Oil is also a suitable option if you want the flavor of the curry or side dish to stand out more than the bread itself.
Can You Use Butter?
Butter can be brushed onto freshly cooked paratha for extra richness.
However, because butter contains water and milk solids, it is generally better as a finishing ingredient rather than the primary cooking fat.
Common Mistakes to Avoid
Even experienced home cooks occasionally make mistakes. Knowing what to avoid can help you prepare restaurant-quality homemade flatbread every time.
- Using Too Much Flour
- Skipping the Resting Time
- Cooking on High Heat
- Making the Dough Too Dry
- Pressing Too Hard While Rolling
How to Store Homemade Paratha
One of the biggest advantages of learning how to make paratha at home is that you can prepare several parathas in advance and enjoy them throughout the week. Proper storage helps maintain their freshness, softness, and flavor.
Allow the parathas to cool completely before storing them. Stacking hot parathas can trap steam, making them soggy.
Place a sheet of parchment paper or butter paper between each paratha to prevent them from sticking together. Store them in an airtight container or a zip-top bag before placing them in the refrigerator.
Fresh homemade paratha usually stays fresh in the refrigerator for up to three days when stored properly.
Can You Freeze Paratha?
Yes. Freezing is one of the best ways to prepare paratha ahead of time.
Once the cooked parathas have cooled, stack them with parchment paper between each one and place them in a freezer-safe bag. Removing as much air as possible helps prevent freezer burn.
Frozen parathas can usually be stored for up to two months without losing much of their quality.
This makes homemade paratha perfect for busy mornings, meal preparation, or quick family dinners.
How to Reheat Paratha
Reheating paratha correctly helps restore its soft texture and crispy layers.
The easiest method is to place the paratha on a hot tawa over medium heat. Cook each side for about one minute until warm and slightly crisp again.
You can also brush a small amount of ghee over the surface while reheating to refresh its buttery aroma and improve the texture.
Although a microwave can be used, it often softens the crispy layers. For the best results, reheating on a skillet or tawa is recommended.
What to Serve with Paratha
One reason plain paratha is so popular is that it pairs well with a wide variety of dishes.
For breakfast, enjoy fresh paratha with yogurt, butter, honey, pickle, or a cup of hot tea.
At lunch or dinner, serve it alongside your favorite curries, lentils, grilled chicken, or vegetable dishes.
Some delicious combinations include:
- Chicken curry
- Beef curry
- Dal
- Chana masala
- Mixed vegetable curry
- Yogurt
- Mint chutney
- Mango pickle
- Omelets
- Scrambled eggs
Because paratha has a mild buttery flavor, it complements both spicy and mild dishes equally well.
Popular Variations of Paratha
Once you master how to make paratha at home, you can experiment with many delicious variations.
- Aloo Paratha
- Paneer Paratha
- Keema Paratha
- Methi Paratha
- Lachha Paratha
- Plain Paratha
How Beginners Can Make Perfect Paratha
If this is your first time making paratha, do not worry if the shape is not perfectly round. The flavor and texture are much more important than appearance.
Focus on preparing soft dough, allowing enough resting time, and cooking over medium heat.
As you practice, rolling the dough becomes easier, and the layers become more defined.
Every batch helps you improve your technique, and before long, making homemade paratha will become a natural part of your cooking routine.
Remember that even experienced cooks continue learning new techniques. Small improvements in kneading, rolling, and cooking make a big difference over time.
Why Homemade Paratha Is Better Than Store-Bought
Store-bought parathas are convenient, but they cannot match the freshness of homemade bread.
Freshly prepared paratha has a softer texture, crispier layers, and a richer aroma. You also have complete control over the ingredients, allowing you to choose high-quality atta, fresh ghee, and the amount of salt or oil you prefer.
FAQs
How do you make paratha at home?
To make paratha at home, prepare a soft dough using whole wheat flour, water, salt, and a little oil or ghee. Let the dough rest, roll it into layers, cook it on a hot tawa with ghee or oil, and serve it warm.
What is the best flour for paratha?
Whole wheat flour, also known as atta, is the traditional and most popular choice. It creates soft dough and produces flavorful, flaky parathas.
Why is my paratha hard?
Paratha usually becomes hard if the dough is too dry, the resting time is skipped, or it is cooked for too long over high heat.
Can I use all-purpose flour instead of atta?
Yes. All-purpose flour can be used, but traditional whole wheat flour provides a more authentic flavor and texture.
Can I freeze homemade paratha?
Yes. Cool the parathas completely, separate them with parchment paper, and freeze them in an airtight bag for future use.
Conclusion
Learning how to make paratha at home is a valuable kitchen skill that allows you to prepare fresh, soft, and flaky homemade paratha whenever you like. With the right whole wheat flour, proper kneading, enough resting time, careful rolling, and balanced cooking on a hot tawa, you can create restaurant-quality plain paratha right in your own kitchen.
Whether you enjoy it with curry, yogurt, tea, or your favorite breakfast dishes, homemade paratha always brings comfort and authentic flavor to the table. Practice the techniques shared in this guide, experiment with different variations, and make every meal more enjoyable with freshly cooked paratha.
For more authentic recipes, cooking tips, and traditional food guides, keep exploring LaGrub and discover new ways to bring homemade flavors into your kitchen.

Maimoona Ehtisham
Maimoona Ehtisham writes for Lagrub on cooking, recipes, and mindful culinary living.
Join the Conversation
Log in to read and share comments, recipes tips, and connect with other food lovers.