

The best lighting for food photography at home can turn everyday meals into stunning, professional-quality images. Whether you rely on natural window light, artificial lighting, or a smartphone, the right lighting techniques enhance texture, colour, and freshness. This comprehensive LaGrub guide shares practical tips to help you capture beautiful, appetising food photos with confidence.
The best lighting for food photography at home can transform ordinary meals into stunning, professional-looking images. Whether you're using natural window light, artificial lighting, or a smartphone, mastering lighting techniques is the key to capturing vibrant textures, rich colours, and irresistible food photos. This complete LaGrub guide shares expert tips to help you create beautiful food photography from home.
Creating stunning food photography is not about owning expensive cameras or professional studio equipment. The true secret behind mouthwatering food images is lighting.
The best lighting for food photography at home can transform a simple plate of food into a visually irresistible masterpiece. Whether you are photographing homemade desserts, restaurant-style meals, traditional desi dishes, healthy breakfast bowls, or social media content for Lagrub, lighting is what makes your food look fresh, vibrant, and appealing.
Many beginners spend money on cameras before learning light.
This is a mistake.
A simple smartphone with excellent food photography lighting will almost always produce better results than an expensive camera used under poor lighting conditions.
This complete Lagrub guide explores everything you need to know about creating professional food photos at home.
You will learn:
- How light affects food texture
- The best natural light setups
- Artificial lighting techniques
- Advanced reflector positioning
- Smartphone lighting methods
- Editing and post-processing
- Seasonal lighting adjustments
- Professional styling strategies
- Expert food photography secrets
By the end, you will know exactly how to create the best lighting setup for food photography and produce images that stand out.
Why Food Photography Depends on Lighting
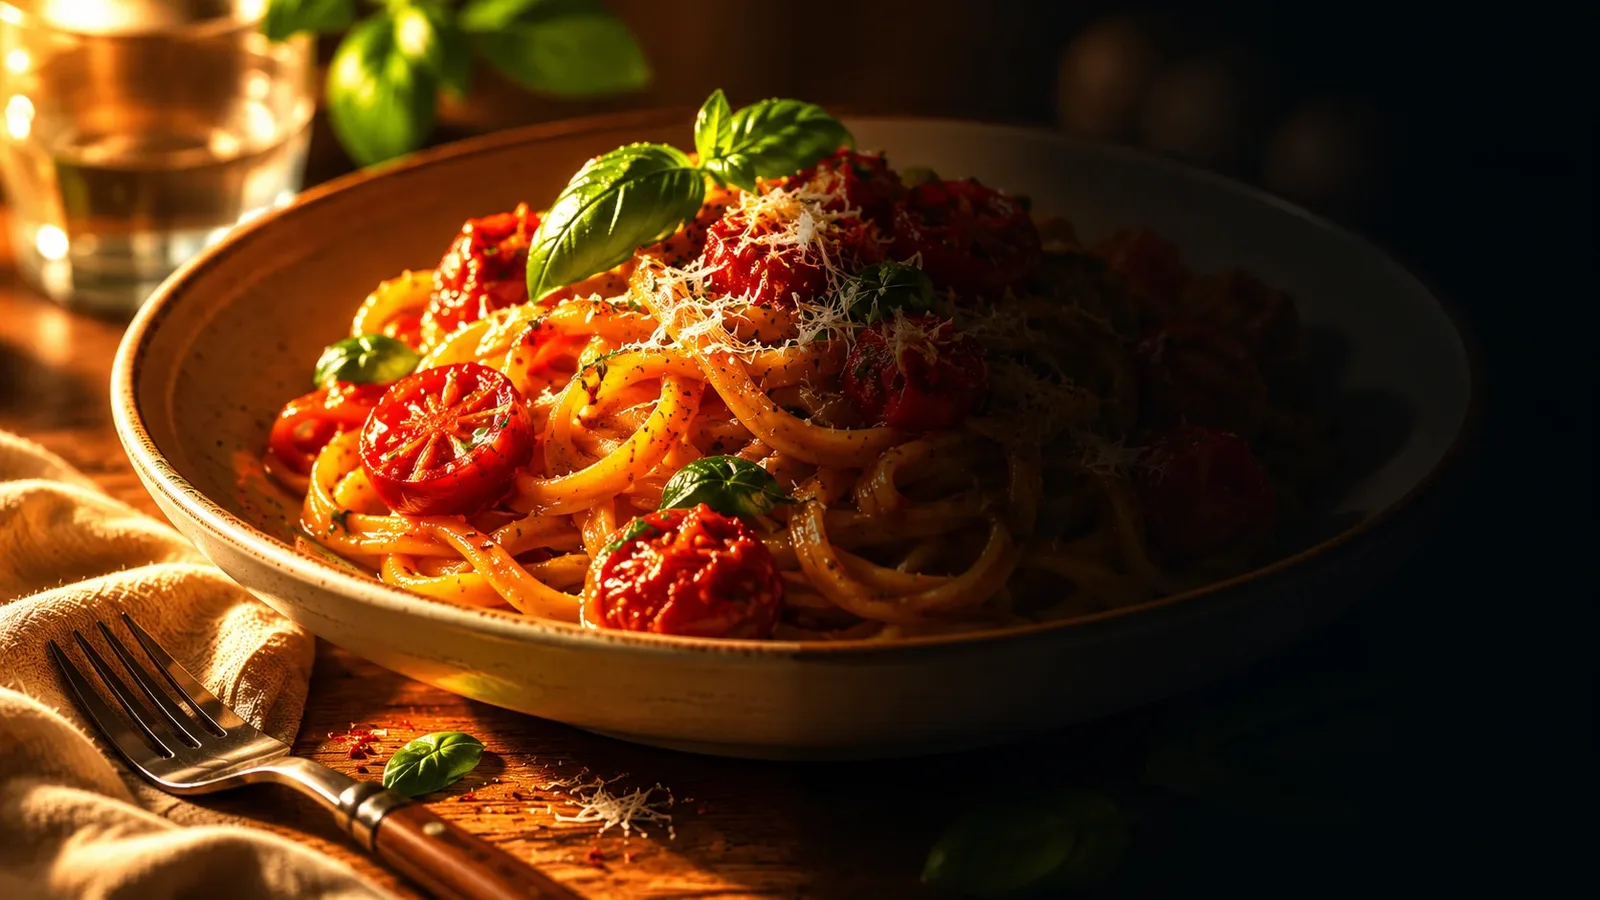
When people see food photography, their brains instantly evaluate freshness.
They look for visual clues like:
- Texture
- Color
- Moisture
- Shine
- Depth
- Contrast
All these visual details are created by light.
Without proper lighting:
- A burger looks dry.
- The soup looks flat.
- The cake looks dense.
- Drinks lose sparkle.
- Fresh herbs lose color.
With the best lighting for food photography at home, food becomes visually alive.
Light creates:
- Gloss on sauces
- Steam visibility
- Crispy texture detail
- Soft bread highlights
- Rich chocolate shine
- Bright fruit freshness
This is why professional food photographers focus on controlling light first.
How Human Eyes Respond to Food Lighting
Food photography works because it triggers appetite.
Light plays a psychological role.
Warm soft light creates comfort.
Bright natural light creates freshness.
Dramatic shadows create luxury.
The way your light source interacts with food influences emotion.
For example:
- Soft morning light on pancakes creates warmth.
- Strong side light on steak creates richness.
- Backlighting on tea creates comfort.
For Lagrub, this emotional storytelling matters.
The right food photography lighting does more than show food.
It creates cravings.
Understanding Light Behavior on Food Surfaces
Different foods reflect light differently.
Reflective Foods
These include:
- Soups
- Sauces
- Glazed desserts
- Drinks
These need controlled highlights.
Matte Foods
These include:
- Bread
- Rice
- Cakes
- Roasted vegetables
These need side lighting to show texture.
Transparent Foods
These include:
- Juices
- Tea
- Gelatin desserts
These work best with backlighting.
Understanding this helps create the best lighting for food photography at home for every dish.
The Science of Light Direction
Professional photographers understand light direction deeply.
Each direction creates a different effect.
45-Degree Side Lighting
This is often ideal.
It balances:
- Depth
- Texture
- Detail
- Shadow softness
This is the most versatile lighting setup for food photography.
Pure Side Lighting
Creates strong texture.
Best for:
- Crispy foods
- Layered sandwiches
- Artisan bread
Back Side Lighting
Creates subtle glow.
Perfect for:
- Curries
- Drinks
- Soups
Top Light
Useful for flat lays.
Works for:
- Pizza
- Charcuterie boards
- Table spreads
Creating a Professional Window Light Studio
Natural window light is still the easiest way to create beautiful food photography.
To build a proper setup:
Step 1: Choose the Right Window
Large windows are ideal.
North-facing windows provide consistent soft light.
Step 2: Control Intensity
Use a diffuser if light is harsh.
Step 3: Add Reflectors
Place reflectors opposite the light.
Step 4: Position Food Correctly
Move food slowly until shadows look balanced.
This simple method often creates the best lighting for food photography at home.
Advanced Reflector Techniques
Reflectors are often underestimated.
Professional photographers use them constantly.
White Reflector
Softens shadows naturally.
Silver Reflector
Adds stronger brightness.
Good for darker food scenes.
Gold Reflector
Adds warmth.
Useful for baked goods.
Black Reflector
Creates contrast by absorbing light.
Excellent for moody photography.
These reflector techniques elevate food photography lighting dramatically.
Advanced Artificial Light Techniques
Artificial light allows total consistency.
To make artificial light look natural:
Use Large Diffusion Panels
Larger diffusion creates softer light.
Position Light Higher
This mimics natural window light.
Feather the Light
Aim light slightly away from food.
This softens intensity.
Use Fill Cards
Bounce light back gently.
These professional methods create realistic artificial light food photography.
Color Theory in Food Photography Lighting
Color and light work together.
Warm light enhances:
- Bread
- Coffee
- Curry
- Chocolate
Cool light enhances:
- Salads
- Smoothies
- Seafood
Neutral light is safest.
Choosing the right color temperature improves food photography at home.
The Importance of Light Falloff
Light falloff is how brightness decreases over distance.
When food is closer to light:
- It appears brighter.
When farther away:
- It becomes darker.
Use this intentionally.
Light falloff creates natural depth.
This technique helps build professional food photography lighting.
Editing to Enhance Lighting
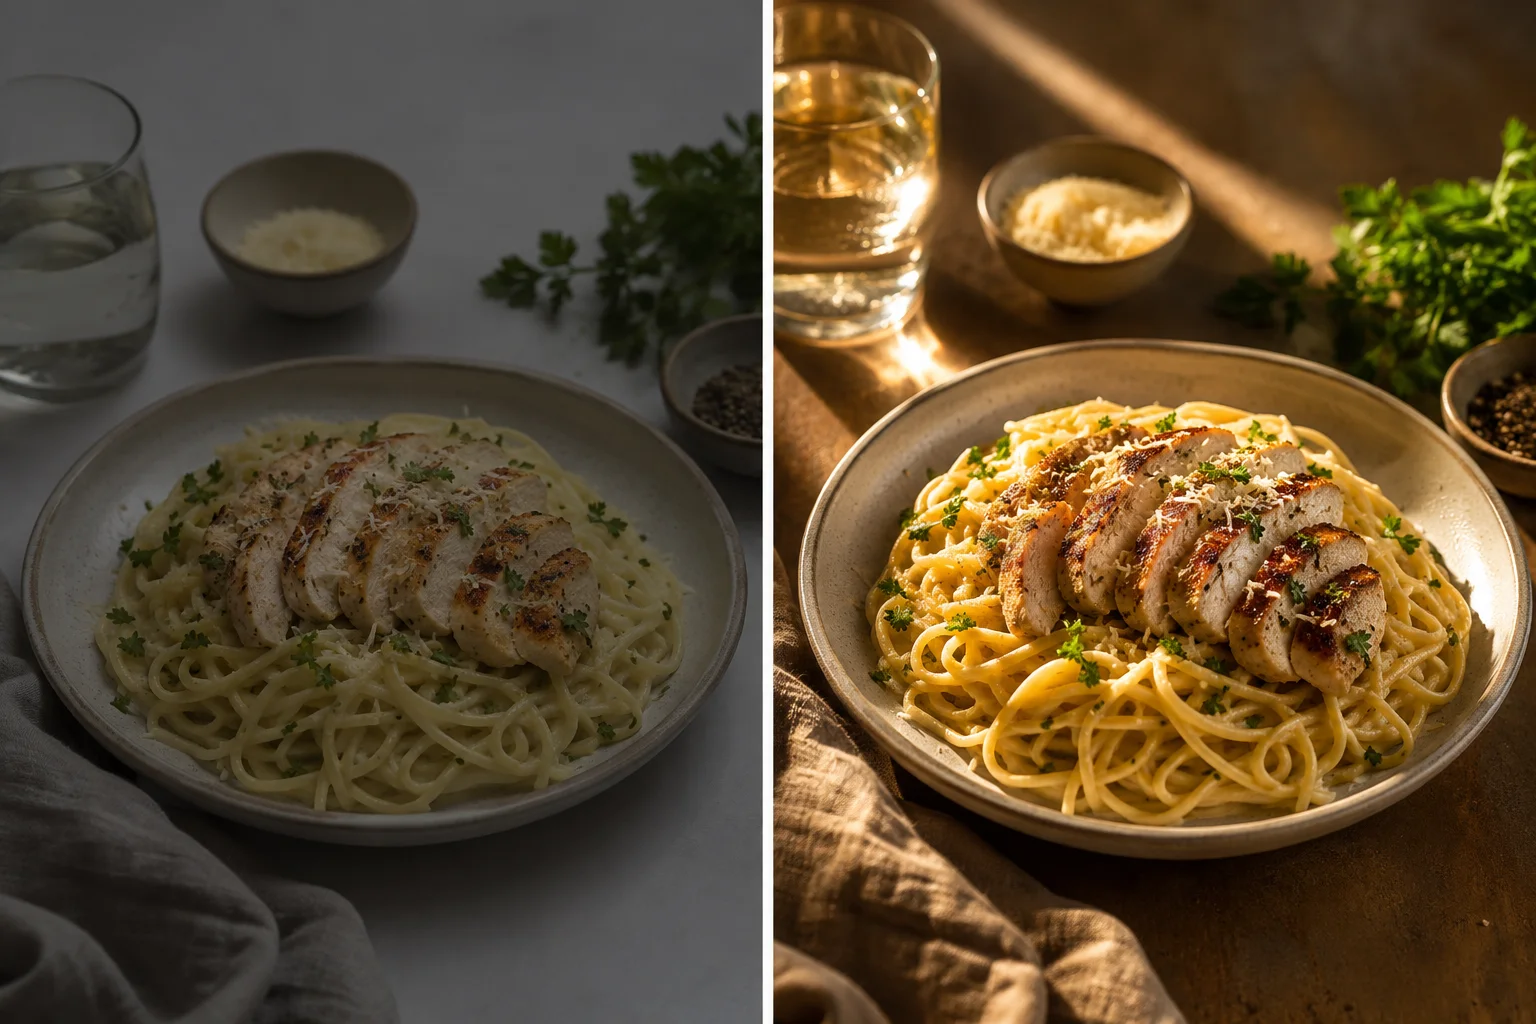
Good editing improves already strong lighting.
It should not fix poor lighting.
Editing adjustments:
Exposure
Fine-tune brightness.
Highlights
Reduce harsh shine.
Shadows
Lift dark areas slightly.
Contrast
Add depth carefully.
White Balance
Correct color tone.
Subtle editing supports the best lighting for food photography at home.
Creating Storytelling Through Lighting
Every food image tells a story.
Lighting helps tell it.
Morning Story
Use bright soft light.
Great for:
- Breakfast
- Tea
- Fresh fruit
Cozy Evening Story
Use warm side light.
Perfect for:
- Soups
- Coffee
- Comfort food
Elegant Fine Dining Story
Use dramatic directional light.
Perfect for plated gourmet dishes.
For Lagrub, storytelling strengthens engagement.
Seasonal Food Lighting Strategies
Each season offers unique lighting opportunities.
Spring
Soft bright natural light.
Perfect for colorful dishes.
Summer
Strong intense sunlight.
Use heavier diffusion.
Autumn
Warm low-angle light.
Perfect for baked foods.
Winter
Cool soft natural light.
Excellent for moody scenes.
Adjusting to seasons improves home food photography setup.
Using Negative Fill for Depth
Negative fill uses black surfaces to deepen shadows.
This creates:
- Drama
- Contrast
- Shape
Place black foam board opposite the light.
This creates cinematic food photography lighting.
Professional Food Styling for Better Lighting
Lighting and styling work together.
To maximize light:
Add Moisture
Use small water sprays.
Makes food fresher.
Add Shine
Use tiny oil brush strokes.
Enhances highlights.
Create Texture Layers
Layer ingredients naturally.
This gives light more surfaces to reveal.
Smartphone Lighting Secrets Professionals Use
Even professionals use phones.
For stronger smartphone food photography:
- Use HDR carefully
- Shoot in RAW if possible
- Lock focus
- Lower exposure manually
- Stabilize with tripod
Combined with the best lighting for food photography at home, smartphones perform exceptionally well.
Social Media Food Photography Lighting Trends
Modern food photography trends include:
Bright Minimalism
Soft clean light.
Moody Editorial
Dark shadows and contrast.
Rustic Natural
Warm organic side light.
Lifestyle Storytelling
Natural environmental light.
Understanding trends helps Lagrub stay competitive.
Building a Signature Lighting Style
Successful creators have recognizable lighting.
Ask yourself:
Do you want:
- Bright airy freshness?
- Cozy warmth?
- Bold contrast?
- Rustic storytelling?
Consistency builds identity.
This is critical for strong food photography at home branding.
Common Advanced Mistakes
Even experienced photographers make mistakes.
Overusing Reflectors
This removes depth.
Too Much Diffusion
This creates flatness.
Poor White Balance Correction
This makes food unnatural.
Excessive Editing
This destroys realism.
Balance is everything.
Practical Food Lighting Exercises
Practice these.
Exercise 1
Photograph the same dish with:
- Side light
- Backlight
- Front light
Compare results.
Exercise 2
Use reflector distances:
- 6 inches
- 12 inches
- 24 inches
Notice shadow changes.
Exercise 3
Shoot at different times of day.
This improves understanding.
These exercises build mastery.
The White Bedsheet Window Diffusion Hack: A Powerful DIY Lighting Trick
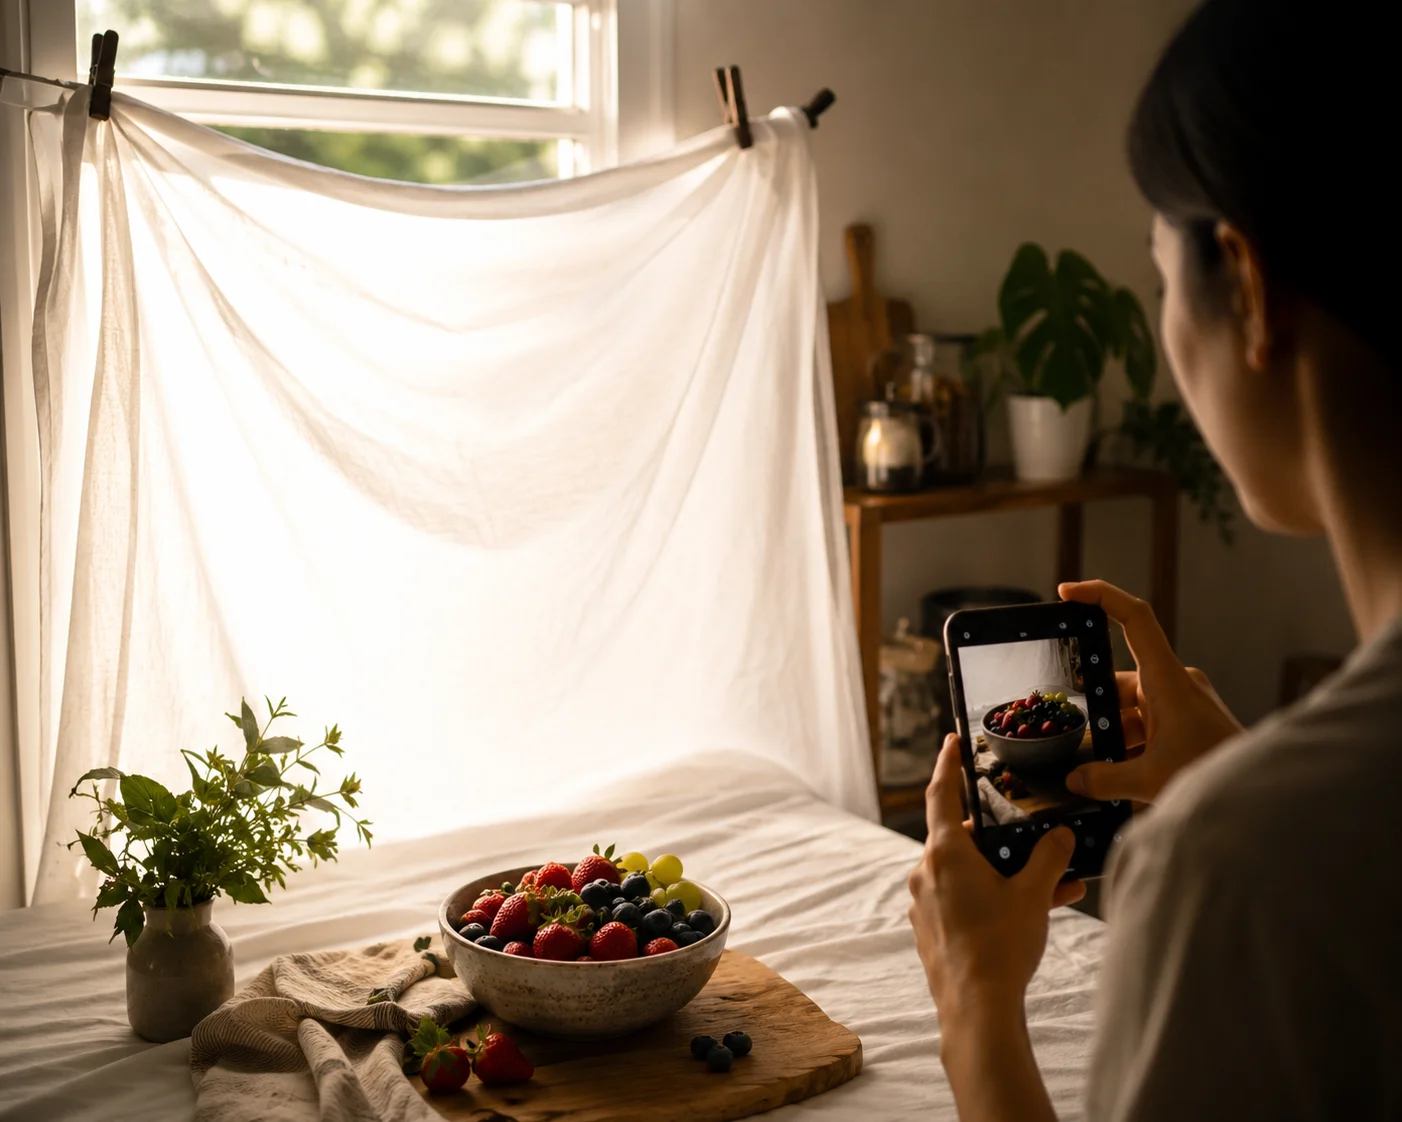
One of the easiest and most effective hacks for achieving the best lighting for food photography at home is using a simple white bedsheet as a giant diffuser.
Many beginners struggle because direct sunlight from a window creates harsh shadows and bright highlights. These strong contrasts can make food look uneven, overexposed, and less appealing.
Professional photographers solve this by using expensive diffusion panels.
At home, you can create the same effect using a plain white bedsheet.
This simple trick transforms harsh natural light into soft, flattering food photography lighting.
Why This Hack Works
A white bedsheet spreads incoming light evenly.
Instead of intense sunlight hitting the food directly, the fabric softens and disperses the light.
This creates:
- Softer shadows
- Balanced exposure
- Better highlight control
- Smoother texture visibility
- More professional depth
The result is soft diffused light, which is ideal for most food photography.
This is why this method is considered one of the smartest ways to create the best lighting for food photography at home without expensive equipment.
What You Need
You only need:
- A plain white bedsheet
- A bright window
- Tape or clips
- A reflector (optional)
- Your food setup
The bedsheet should be:
- Thin enough to let light pass through
- White for neutral color balance
- Clean and wrinkle-free
Avoid colored sheets because they can affect white balance.
Step-by-Step Setup
Step 1: Choose the Right Window
Select a window that gets strong natural light.
Large windows work best.
If possible, choose:
- East-facing windows for soft morning light
- North-facing windows for consistent light
These often produce the best results.
Step 2: Attach the Bedsheet
Secure the white bedsheet across the window using:
- Cloth clips
- Tape
- Curtain hooks
Stretch it evenly.
Avoid folds because wrinkles create uneven light patterns.
Step 3: Position Your Food
Place your food setup about 2–4 feet from the diffused window.
This distance usually creates the perfect balance.
If the light feels too bright:
Move farther back.
If the scene looks dark:
Move closer.
This adjustment is essential for finding the best lighting setup for food photography.
Step 4: Add a Reflector
Place a white foam board opposite the window.
This bounces light back into shadows.
It creates:
- Better exposure balance
- Softer contrast
- Cleaner detail
This reflector-bed sheet combination creates highly professional food photography lighting.
Step 5: Test Multiple Angles
Now rotate your dish.
Test:
- Side lighting
- Backlighting
- 45-degree light angles
Notice how texture changes.
For most dishes, side lighting delivers the best lighting for food photography at home.
Best Foods for This Hack
Desserts
The soft light highlights frosting and texture.
Perfect for:
- Cakes
- Cupcakes
- Cookies
Breakfast Foods
Creates bright clean detail for:
- Pancakes
- Waffles
- Fruit bowls
Desi Dishes
The soft diffusion preserves rich curry color and detail.
Ideal for:
- Biryani
- Karahi
- Haleem
- Nihari
Drinks
Diffused backlighting creates a smooth glow.
Perfect for:
- Tea
- Smoothies
- Coffee
Why This Hack Beats Direct Window Light
Direct window light often creates:
- Harsh shadows
- Overexposed highlights
- Uneven brightness
- Difficult editing
The bedsheet hack creates:
- Controlled light
- Smooth transitions
- Better texture
- Easier editing
This makes post-processing much simpler.
Common Mistakes to Avoid
Avoid these errors.
Using Thick Fabric
Too much thickness blocks light.
Using Colored Fabric
This changes food color.
Placing Food Too Close
This may still create harsh highlights.
Ignoring Reflectors
Reflectors improve balance dramatically.
Why Lagrub Creators Should Use This Hack
For Lagrub food content, consistency matters.
The white bedsheet diffusion hack creates repeatable professional results.
It helps produce food images that look:
- Clean
- Bright
- Professional
- Appetizing
- Brand-consistent
This simple setup can dramatically improve your food photography at home and help create the polished visual identity Lagrub needs.
Sometimes the best lighting for food photography at home is not about expensive tools.
It is about using everyday items creatively.
FAQs
What light is best for food photography?
Soft side light is usually ideal.
Can artificial light replace natural light?
Yes, with proper diffusion.
Is a reflector necessary?
Highly recommended.
How can I make food look fresh?
Use balanced highlights and styling.
Should beginners use natural light?
Yes, it is the easiest way to learn.
Conclusion
Mastering the best lighting for food photography at home is not about buying expensive equipment. It is about understanding how light behaves.
Once you learn:
- Direction
- Diffusion
- Reflection
- Shadow control
- Exposure balance
Your food photography will improve dramatically.
Start simple:
- Use your window.
- Experiment daily.
- Observe shadows.
- Study textures.
- Practice consistently.
For LaGrub, strong food photography lighting is one of the most powerful ways to create memorable visual content. Beautiful lighting turns ordinary food into compelling visual stories that attract attention, increase engagement, and make every dish impossible to ignore.
At LaGrub, we believe every delicious recipe deserves equally stunning photography. By applying the techniques in this guide, you can confidently capture professional-quality food images that highlight texture, colour, and freshness. Explore more expert food photography tips, styling guides, and authentic recipes on LaGrub to elevate your culinary content and inspire your audience.

Maimoona Ehtisham
Maimoona Ehtisham writes for LaGrub on cooking, recipes, and mindful culinary living.
Get a desi recipe worth cooking, every week
One tested recipe a week. Nothing else, and unsubscribe any time.


